A Complete guide to setting Spring Security 5 OAuth2 Login using Facebook, Google, Okta, and Github and various other configurations.
Tutorial Contents
Overview
Spring Security 5 introduced the OAuth 2.0 Login feature for Spring and Spring Boot Applications. Using that, users who have an account with OAuth 2.0 Providers (like Google or Facebook etc) can login into your application.
In this tutorial we will configure Spring Security 5 OAuth2 Login in Spring Boot (and Spring) application. We will follow simple steps to register your application to OAuth providers – Google, Facebook, Okta, and Github. Once the OAuth2 Login is enabled, we will learn to customize various configurations custom login or success or failure pages, accessing user info, and having custom authorization URI, etc.
Setup
For this tutorial we will need a Spring or Spring Boot Application upon which we will enable the Spring Security OAuth2 Login. To quickly bootstrap a Spring Boot application from scratch refer to Create a Spring Boot REST Service article.
Spring (Non Spring Boot) Dependency
If you have a Spring non-boot application, you need to add next two dependencies in your Maven configuration.
<dependency>
    <groupId>org.springframework.security</groupId>
    <artifactId>spring-security-oauth2-client</artifactId>
    <version>{version here}</version>
</dependency>
<dependency>
    <groupId>org.springframework.security</groupId>
    <artifactId>spring-security-oauth2-jose</artifactId>
    <version>{version here}</version>
</dependency>Code language: HTML, XML (xml)
As this tutorial is based on Spring Security 5, add the latest versions of the these dependencies from here and here.
Spring Boot Dependency
On the other hand, for Spring Boot applications we only need Spring Security OAuth2 Client dependency.
<dependency>
    <groupId>org.springframework.security</groupId>
    <artifactId>spring-security-oauth2-client</artifactId>
</dependency>Code language: HTML, XML (xml)
Also, we do not need to provide the version explicitly. That is because, Spring Boot dependency manager implicitly takes care of the versions.
OAuth2 Authentication Providers
So far, we have a Spring or a Spring Boot application with the required dependencies. In order to use OAuth in the application, we need an authentication provider. Spring Security has an in-built support for Google, Facebook, Okta, and GitHub authentication providers. That means spring security takes care of all the default configurations required to enable these providers.
Google OAuth2 Login
In order to enable Google OAuth2 Login within Spring security, we first need to get client credentials from Google. To do that, we need to register our application at Google API Console.
- Visit the Google API Console at https://console.developers.google.com/.
- Go to the ‘Credentials’ section and click to add new Credential and select type ‘OAuth client ID’.
- Select application type as ‘Web Application’ and enter the name of the application.
- Lastly, we need to add redirect URI in the ‘Authorized redirect URIs’ section.
Next is the default template of redirect URI in Spring Security. The registrationId represents the authorisation provider service.
{baseUrl}/login/oauth2/code/{registrationId}
Thus, for Google OAuth2 the redirect API will become:
http://localhost:8080/login/oauth2/code/google
Add this redirect URI on the Google API Console and click save. Once done, you will see a unique Client ID and Client Secret that we will use in the application configuration as shown.
spring:
  security:
    oauth2:
      client:
        registration:
          google:
            client-id: < Enter Google Client ID >
            client-secret: < Enter Google Client Secret >Code language: YAML (yaml)
Facebook OAuth2 Login
Similar to Google Login, we need to create credentials for our app on Facebook.
- Visit Facebook Developers portal at https://developers.facebook.com/apps/.
- Use ‘Create App’ and provide your project type.
- Once the app is created, go to ‘Facebook Login’-> ‘Settings’ section.
- Chose ‘Client OAuth Login’ and provide a ‘Valid OAuth Redirect URI’.
We have seen the Spring Security redirect URI template in previous section. Based on that, for facebook login our redirect URI looks like this:
http://localhost:8080/login/oauth2/code/facebook
Once this is done, copy the App ID and App Secret and use them in the application config.
spring:
  security:
    oauth2:
      client:
        registration:
          facebook:
            client-id: < Enter Facebook App ID >
            client-secret: < Enter Facebook App Secret >Code language: YAML (yaml)
Github OAuth2 Login
Next, we will setup GIthub OAuth2 Login with Spring Security 5. Similar to Google and Facebook, we need to register our application with Github and grab the credentials.
- Visit ‘Github Developer Settings’ at https://github.com/settings/developers.
- Chose ‘OAuth Apps’ and click ‘New OAuth App’.
- On the next screen provide application name, home page url and a redirect URL at ‘Authorization callback URL’.
Following will be our Github login redirect URL.
http://localhost:8080/login/oauth2/code/github
After that, grab the Client ID and Client Secret and add it to Spring’s application properties.
spring:
  security:
    oauth2:
      client:
        registration:
          github:
            client-id: < Enter Github Client ID >
            client-secret: < Enter Github Client Secret >Code language: YAML (yaml)
Okta OAuth2 Login
Lastly, we will setup Okta OAuth2 Login within our application. We will first need to setup an account with Okta and register your application in it.
- Navigate to Okta and create a developer account at https://www.okta.com/developer/signup/.
- Once the registration is done, you will be assigned a unique subdomain. For example,
https://<Subdomain>.okta.com/. Sign into your subdomain. - Go to ‘Applications’ -> ‘Applications’ and ‘Create App Integration’ by selecting ‘OIDC – OpenID Connect’ and ‘Web Application’ type.
- Enter project details and provide redirect URI as `http://localhost:8080/login/oauth2/code/okta`.
Once this is done, capture the Client ID and Client Secret and configure Okta OAuth2 Login the in application configuration file.
spring:
  security:
    oauth2:
      client:
        registration:
          okta:
            client-id: < Enter Okta Client ID >
            client-secret: < Enter Okta Client Secret >
        provider:
          okta:
            authorization-uri: https://<subdomain>.okta.com/oauth2/v1/authorize
            token-uri: https://<subdomain>.okta.com/oauth2/v1/token
            user-info-uri: https://<subdomain>.okta.com/oauth2/v1/userinfo
            jwk-set-uri: https://<subdomain>.okta.com/oauth2/v1/keysCode language: YAML (yaml)
Spring Boot Security Configuration
In order to enable Spring Security OAuth2 Login within a Spring Boot application it needs ‘spring-boot-starter-oauth2-client’ dependency and provide at least one client credentials. Spring boot auto configuration sets up Oauth2ClientAutoConfiguration instance, which is responsible for enabling required configurations.
Previously we have added required dependencies into the application and also registered our application with Google, Facebook, Okta and Github. Let’s consolidate all of the OAuth2 Client credentials in application.yaml file.
spring:
  security:
    oauth2:
      client:
        registration:
          google:
            client-id: < Enter Google Client ID >
            client-secret: < Enter Google Client Secret >
          facebook:
            client-id: < Enter Facebook App ID >
            client-secret: < Enter Facebook App Secret >
          github:
            client-id: < Enter Github Client ID >
            client-secret: < Enter Github Client Secret >
          okta:
            client-id: < Enter Okta Client ID >
            client-secret: < Enter Okta Client Secret >
        provider:
          okta:
            authorization-uri: https://<subdomain>.okta.com/oauth2/v1/authorize
            token-uri: https://<subdomain>.okta.com/oauth2/v1/token
            user-info-uri: https://<subdomain>.okta.com/oauth2/v1/userinfo
            jwk-set-uri: https://<subdomain>.okta.com/oauth2/v1/keysCode language: YAML (yaml)
Next, we can enable oauth2Login() element on all the endpoints in the application. However Spring Boot by default enables OAuth2 Login on all endpoints.
Thus, next configuration is not required in a Spring Boot application.
@Configuration
public class ApplicationSecurityConfig
extends WebSecurityConfigurerAdapter {
@Override
protected void configure(HttpSecurity http)
throws Exception {
http.authorizeRequests()
.anyRequest()
.authenticated()
.and()
.oauth2Login();
}
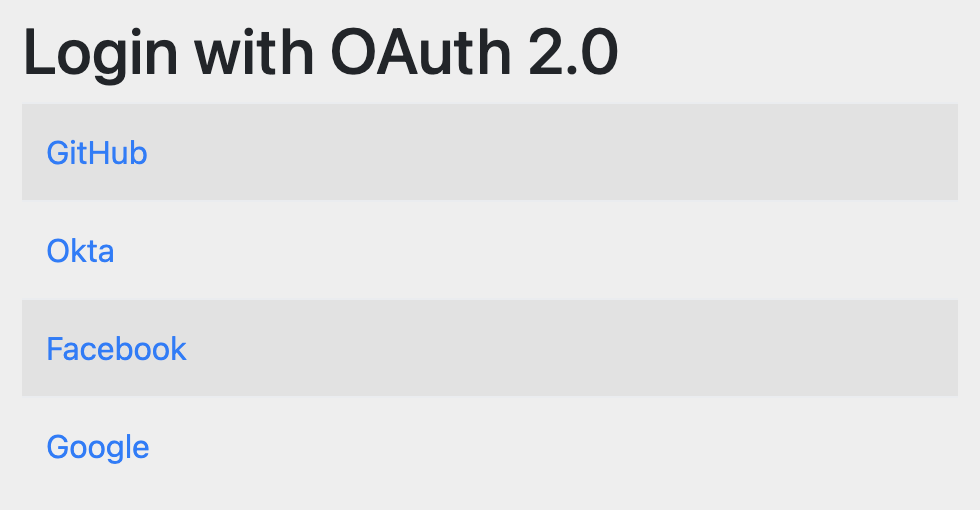
}Code language: Java (java)Now, start the application and access any endpoint from a browser. You should see a Spring Security default Login page having options – Facebook, Google, Okta, and Github.
Users of you application can use any of the authentication provider to login and access the secured endpoints.
Spring (Non Spring Boot) Security Configuration
On the other hand, in Non Spring Boot Spring projects we do not get the auto configuration support. Thus first we need to enable Spring Security by adding @EnableWebSecurity and create a ClientRegistrationRepository.
Create ClientRegistrationRepository
@Configuration
@EnableWebSecurity
public class ApplicationSecurityConfig
        extends WebSecurityConfigurerAdapter {

    @Bean
    private ClientRegistrationRepository clientRegistrationRepository() {
        ClientRegistration facebookClient =
                CommonOAuth2Provider.FACEBOOK.getBuilder("facebook")
                        .clientId(facebookConfig.getClientID())
                        .clientSecret(facebookConfig.getClientSecret())
                        .build();

        ClientRegistration googleClient =
                CommonOAuth2Provider.GOOGLE.getBuilder("google")
                        .clientId(googleConfig.getClientID())
                        .clientSecret(googleConfig.getClientSecret())
                        .build();

        ClientRegistration githubClient =

                CommonOAuth2Provider.GITHUB.getBuilder("github")
                        .clientId(githubConfig.getClientID())
                        .clientSecret(githubConfig.getClientSecret())
                        .build();

        ClientRegistration oktaClient =
                CommonOAuth2Provider.OKTA.getBuilder("okta")
                        .clientId(oktaConfig.getClientID())
                        .clientSecret(oktaConfig.getClientSecret())
                        .build();

        return new InMemoryClientRegistrationRepository(
                facebookClient, googleClient, githubClient, oktaClient);
    }

    ...
}Code language: Java (java)
In the above config, we have created an In Memory Client Registration Repository instance by providing a list of our four Client Registrations – Facebook, Google, Okta, and Github. The security credentials for each of the clients can be read from environment variables or properties files.
Configure ClientRegistrationRepository with HttpSecurity
Next we need to configure the HttpSecurity instance and provide clientRegistrationRepository() and authorizedClientService().
@Override
protected void configure(HttpSecurity http) throws Exception {
    http.authorizeRequests().anyRequest().authenticated()
        .and()
        .oauth2Login()
        .clientRegistrationRepository(clientRegistrationRepository())
        .authorizedClientService(authorizedClientService());
}

@Bean
public OAuth2AuthorizedClientService authorizedClientService() {
    return new InMemoryOAuth2AuthorizedClientService(
        clientRegistrationRepository());
}Code language: Java (java)
With this, we have all the required elements to enable oauth2Login() in a Non-Spring Boot Spring Application. However, unlike Spring Boot, it won’t enable any default login page for user login. Thus, we will need to provide our own Login page. In the coming sections we will learn to create a custom login page.
Custom OAuth2 Login Page
The default OAuth2 Login page shows all the available OAuth2 Clients. Clicking on any of them will take users to the client’s authorization endpoint, where users can complete logging in.
For creating a custom Login page we will need to create a controller endpoint and a view page. In order to show similar options, our view needs a list of available clients and their respective authorization URLs. In Spring security default authorization URL template looks like this.
/oauth2/authorization/{service-name}
We will create a controller endpoint that prepares a HashMap of oauth2 clients and their URLs and load the view.
OAuthController.java
@Controller
public class OAuthController {
private final String URI_BASE = "/oauth2/authorization/";
private final List<String> clients =
List.of("Facebook", "Google", "GitHub");
@GetMapping("/oauth2login")
public String oAuth2LoginPage(Model model) {
Map<String, String> clientUrls =
clients.stream().collect(
toMap(identity(),
client -> URI_BASE + client.toLowerCase()));
model.addAttribute("clientUrls", clientUrls);
return "oauth2login";
}
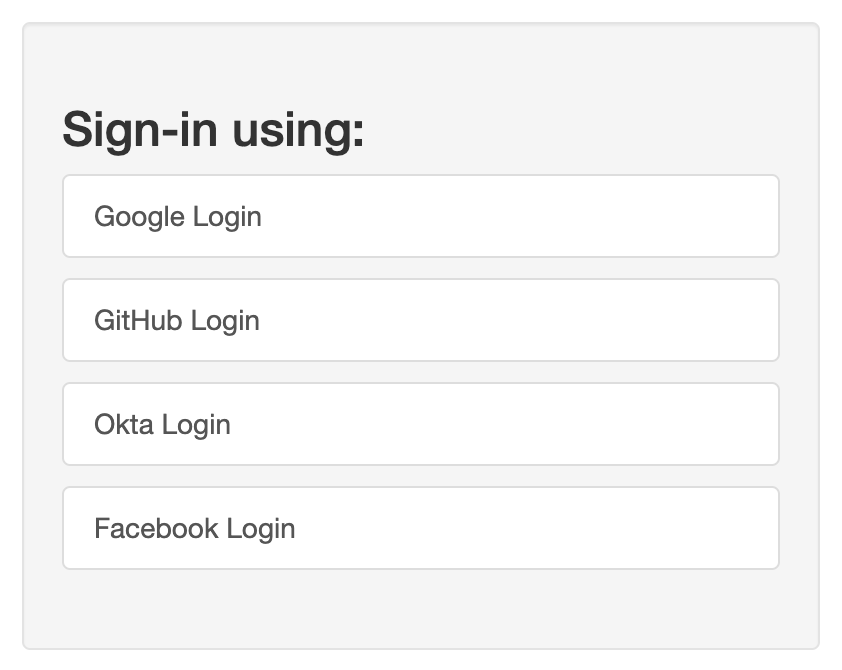
}Code language: Java (java)Secondly, we will create a login page using Thymeleaf that iterates through the provided map of clients and create Login options.
oauth2login.html
<div>
    <p th:each="url : ${clientUrls}">
        <a th:text="${url.key} + ' Login'"
           th:href="${url.value}" >Login</a>
    </p>
</div>Code language: HTML, XML (xml)
Lastly, we need to configure security to forward login requests to our endpoint.
@Override
protected void configure(HttpSecurity http) throws Exception {
    http.authorizeRequests()
        .antMatchers("/oauth2login").permitAll()
        .anyRequest().authenticated()
        .and()
        .oauth2Login().loginPage("/oauth2login");
}Code language: Java (java)
Note that, we have attached a loginPage() by specifying our login endpoint. Now, when we try to access any endpoint in the service we see our custom login page.
Custom OAuth2 Endpoint
As discussed previously, the default OAuth2 authorization endpoint in Spring security is
/oauth2/authorization/{service-name}
Let’s set a custom authorization endpoint in the HttpSecurity configuration.
http.authorizeRequests()
    .anyRequest().authenticated()
    .and()
    .oauth2Login()
    .authorizationEndpoint()
    .baseUri("/authorize-this");Code language: Java (java)
With this,the authorization URL base will change to /oauth2/authorize-this/{service-name}.
If you are using a Spring’s default OAuth2 Login page do the View Source and verify if the URL base is updated. On the other hand, if you are using a custom login page, like we did before, you need to make sure we are passing the updated URI to the view.
Custom Login Success/Failure Pages
We can add our own pages, which can be displayed upon a successful login or an unsuccessful login. To do so, can use defaultSuccessUrl(url) and failureUrl(url) methods on OAuth2LoginConfigurer.
Configuring oauth2Login() to dispaly custom Success/Failure Pages
@Override
protected void configure(HttpSecurity http) throws Exception {
    http.authorizeRequests()
        .anyRequest().authenticated()
        .and()
        .oauth2Login()
        .defaultSuccessUrl("/login_success")
        .failureUrl("/login_failure");
}Code language: Java (java)
Additionally, we can also invoke some code upon a successful or failed login. To do that we need to use successHandler() and failureHandler() methods providing implementations for AuthenticationSuccessHandler and AuthenticationFailureHandler respectively.
Access User Info Endpoint
Once a user successfully logs in, we may need to access the users info. In order to facilitate that, the authentication providers provide an endpoint to access users info.
However, to know the user info endpoint we first need to know, which authorization client is used by the user to login.
First, we will inject an instance of OAuth2AuthorizedClientService into the controller. Remember that, Spring Boot automatically creates this instance. On the other hand, for a non Spring Boot application we have explicitly declared a @Bean factory method for it.
@Controller
public class OAuthController {
    @Autowired
    private OAuth2AuthorizedClientService authorizedClientService;

    ..
}Code language: Java (java)
Next, we need to access OAuth2AuthenticationToken in the success handling endpoint. So we add it as a parameter inside our controller endpoint. Using it we can find out the OAuth2AuthorizedClient instance.
@GetMapping("/login_success")
public String loginSuccessful(
        OAuth2AuthenticationToken authenticationToken,
        Model model ) {

    Auth2AuthorizedClient client =
        authorizedClientService.loadAuthorizedClient(
        authenticationToken.getAuthorizedClientRegistrationId(),
        authenticationToken.getName()
    );

    ...
}Code language: Java (java)
Once we retrieve the client we can grab the user info endpoint like this.
String userInfoUrl = client
    .getClientRegistration()
    .getProviderDetails()
    .getUserInfoEndpoint()
    .getUri();Code language: Java (java)
Lastly we can use Spring WebFlux WebClient to execute this endpoint and download a Map of User Info.
Map userInfo = WebClient.create(userInfoUrl)
    .get()
    .header(HttpHeaders.AUTHORIZATION,
        "Bearer "
            + client.getAccessToken().getTokenValue())
    .retrieve()
    .bodyToMono(Map.class)
    .block();Code language: Java (java)
OAuth2 Login on Specific Endpoints
We may want to enable Spring Security OAuth2.0 Login only on a specific endpoints in our application. To do that, we can use HttpSecurity to configure the OAuth2 Login setting.
For example, using URI Path to configure OAuth2 Login on all endpoints except one.
http.authorizeRequests()
    .antMatchers("/students/{id}").permitAll()
    .anyRequest().authenticated()
    .and()
    .oauth2Login();Code language: Java (java)
As can be seen above, any user can access “/students/{id}” endpoint without any authentication requirement. However, all other endpoints need authentication.
Similarly, we may want only a specific HTTP methods on specific endpoints to be authenticated. Like, we may want to allow free access to read only endpoints like GET students, but mandate authentication for any PUT or POST.
Example of enabling OAuth2 Login on specific HTTP Methods.
http.authorizeRequests()
    .antMatchers(HttpMethod.GET, "/students").permitAll()
    .anyRequest().authenticated()
    .and()
    .auth2Login();Code language: Java (java)
With this only GET requests on students resource are allowed a free access. While other methods need authentication.
Summary
In this tutorial we have covered in-depth introduction to enabling Spring Security OAuth2 Login in Spring or Spring Boot applications using authentication providers like – Google, Facebook, Okta, and Github. Doing so, we started from the scratch by setting up dependency, doing required configurations and registrations. Then, we moved to various configurations and learned to customise various settings – Custom Login Page, custom success or failure page, custom authorization url, custom authentication configurations etc.